Summary: Parc 3D, a Russian start-up, which specializes in the production of metal art objects using 3D technologies (3D scanning and 3D printing) created a project for the city of Vyksa.
The goal: To find an alternative to large sculpture molding and casting.
The tech: Calibry 3D scanner, self-made 3D printer, Calibry Nest software, Marlin software, Meshmixer software.
The result: 2x times faster and cheaper. Production time was reduced from a few months to 10 days, saving about 9,000 euros.
Vyksa, founded in 1765, is a small town in Russia located 350 kilometers east of Moscow. The town has distinct architectural flair with traditional wooden houses closely entwined with industrial buildings. One example of this juxtaposition is an old monastery just few streets away from a huge metallurgical processing plant. You can dive into the town’s atmosphere by taking a 3D tour via Google Maps.
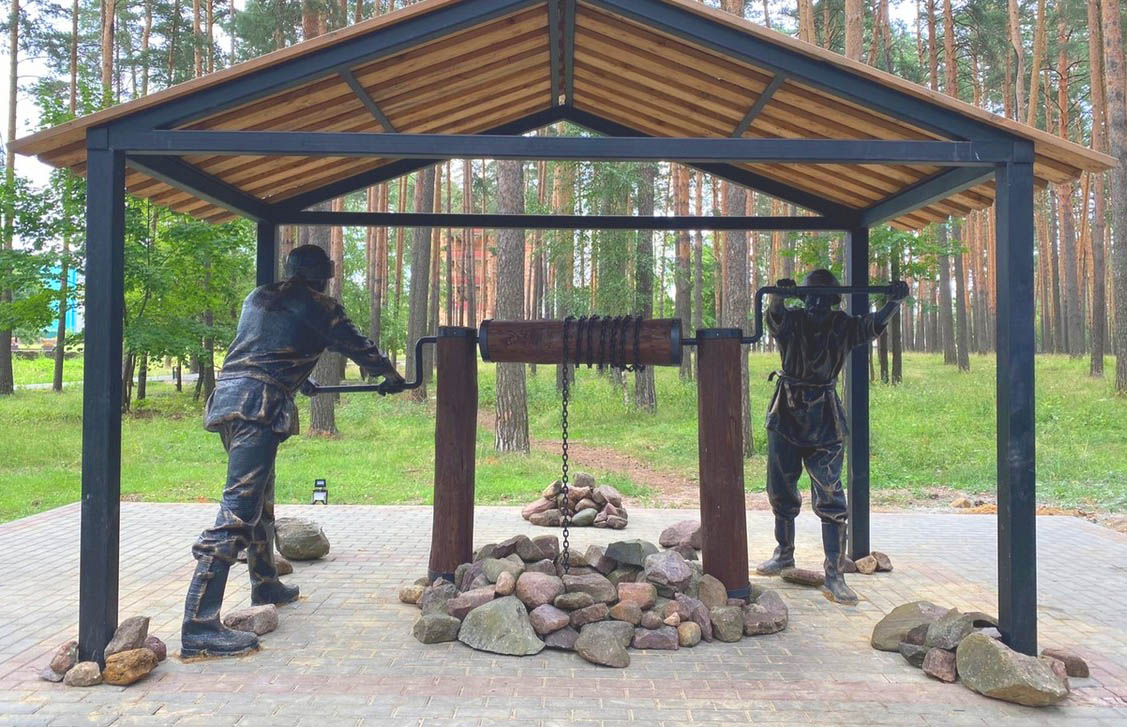
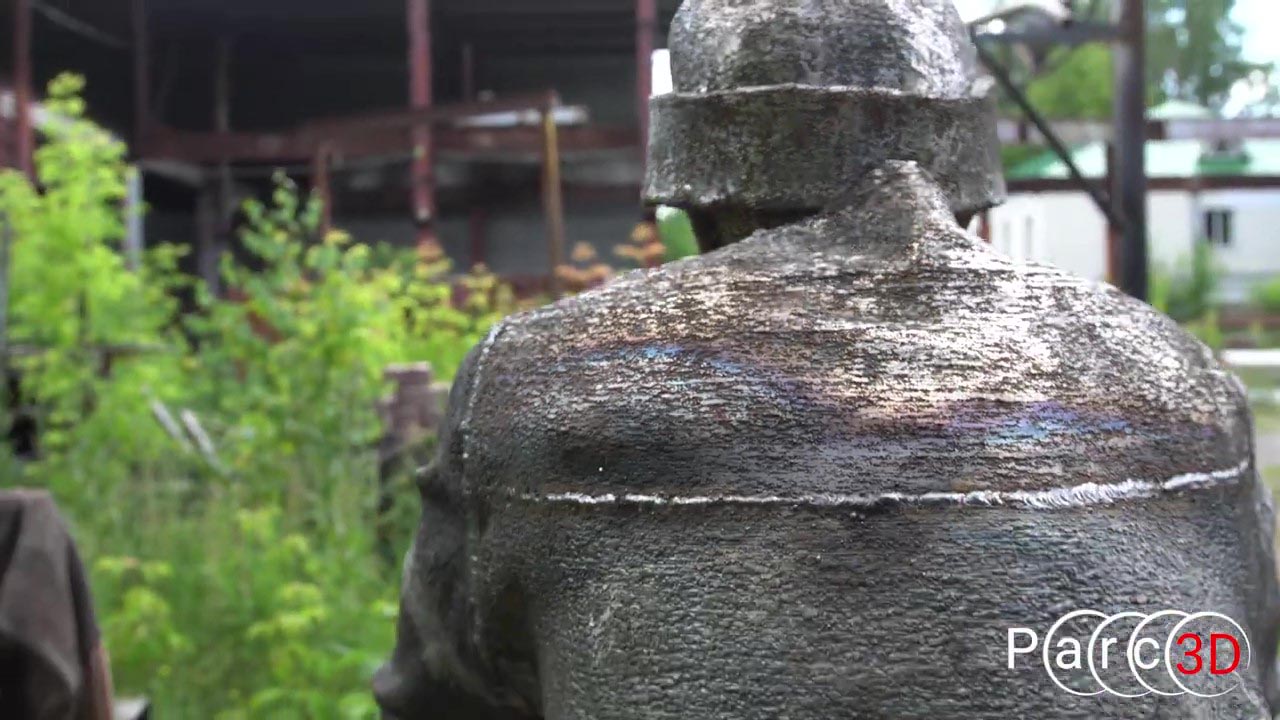
The city administration had been planning a grand celebration for the annual City Day so they commissioned a sculptural composition named “The Prospectors” to symbolize Vyksa. The company awarded this project was Parc 3D, a startup which specializes in the creation of metal art objects using hand forging and laser engraving technology.
Parc 3D was tasked by Vyksa city administration to depict the history and origin of the town based on a sketch of two prospectors designed by local historians and ethnographers. This was quite a challenge as while the company had made art installations before, they weren’t as experienced in making metal sculptures.
A more conventional approach to making a metal statue would be to use molding and casting, which according to Parc 3D’s specialists is expensive and time-consuming since a conventional production of a sculpture would take anywhere from 2 to 6 months and cost approximately 15,000 euros.
The team decided to use 3D technology to make the process more efficient and affordable. First, they needed a metal printer with a printing surface big enough to make large sculptures. After extensively searching the market for such a printer, Parc 3D team decided to make their own metal 3D printer! According to the founders of the company, the primary reason for creating their own printer was the desire to produce more complex and large orders in the art field.
This case study differed from others in several ways:
Step 1. Design and fabricate a 3D printer with a large surface area
Step 2. Find two reference models for the sculptures
Step 3. 3D-scan the models
Step 4. Post-process the scanned data and prepare it for printing
Step 5. Print the two sculptures
Step 6. Prepare the sculptures for assembly
The Parc3D team began by constructing their own 3D printer. All parts of the design and gears were fabricated by the startup specialists, apart from the stepper motors, drivers, and the control board which had to be purchased separately. The software used was based on Marlin open source firmware. The newly created printer consisted of a printing area of 800x800x800mm and high productivity (from 1.5 to 3 kilograms per hour).
The biggest issue was getting the hinged corners to print properly but the team overcame this challenge and this technique is now part of Parc3D’s arsenal.

After the printer was constructed, the team worked closely with historians and ethnographers to pick fitting human models which matched the criteria for the project. These models had to have a specific build, facial features, and decent length beards.
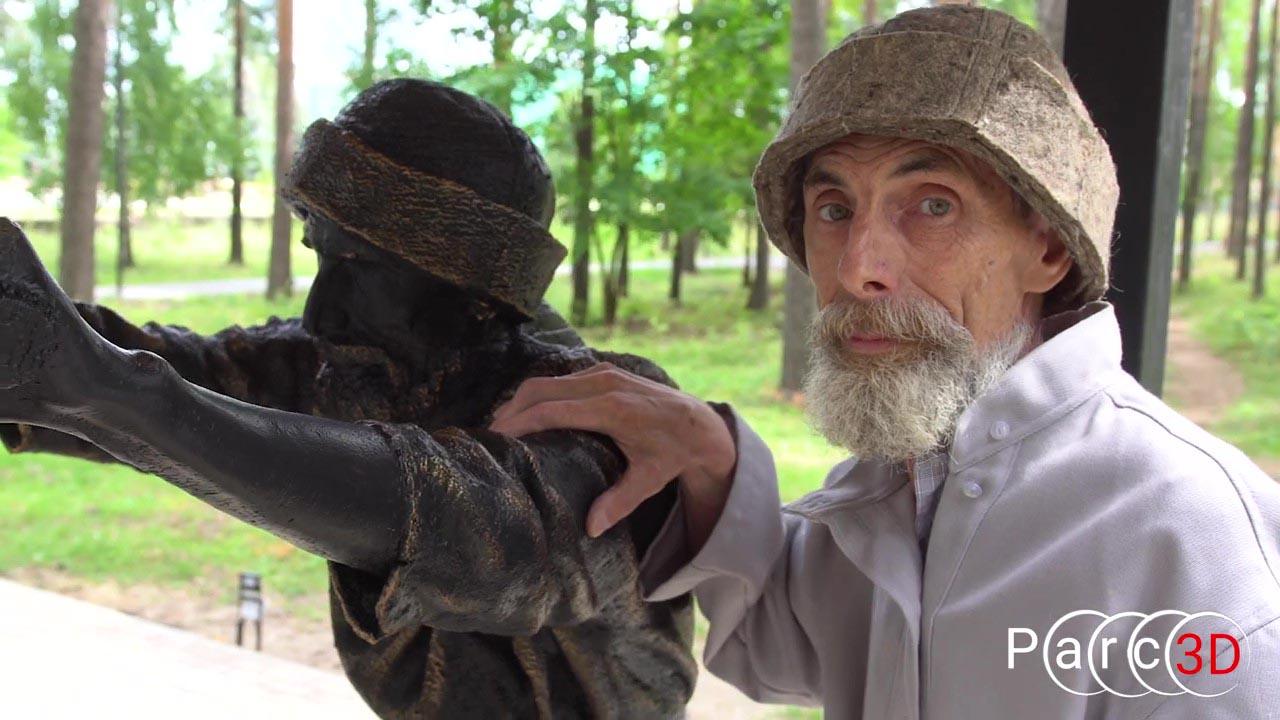
The next step was scanning the chosen models with a Calibry 3D scanner. “We chose Calibry because in our opinion it was the perfect match of price and quality to achieve our goals,” stated Valery Rysin, one of the company founders.
Scanning people can sometimes be tricky as they can unintentionally move their heads, shift from one foot to another, and blink. As Parc3D team’s primary goal was to achieve a good result, they first tried scanning with markers. After the introduction of the Live3D function, the team scanned in geometry mode and managed to get decent high-resolution scanned data.
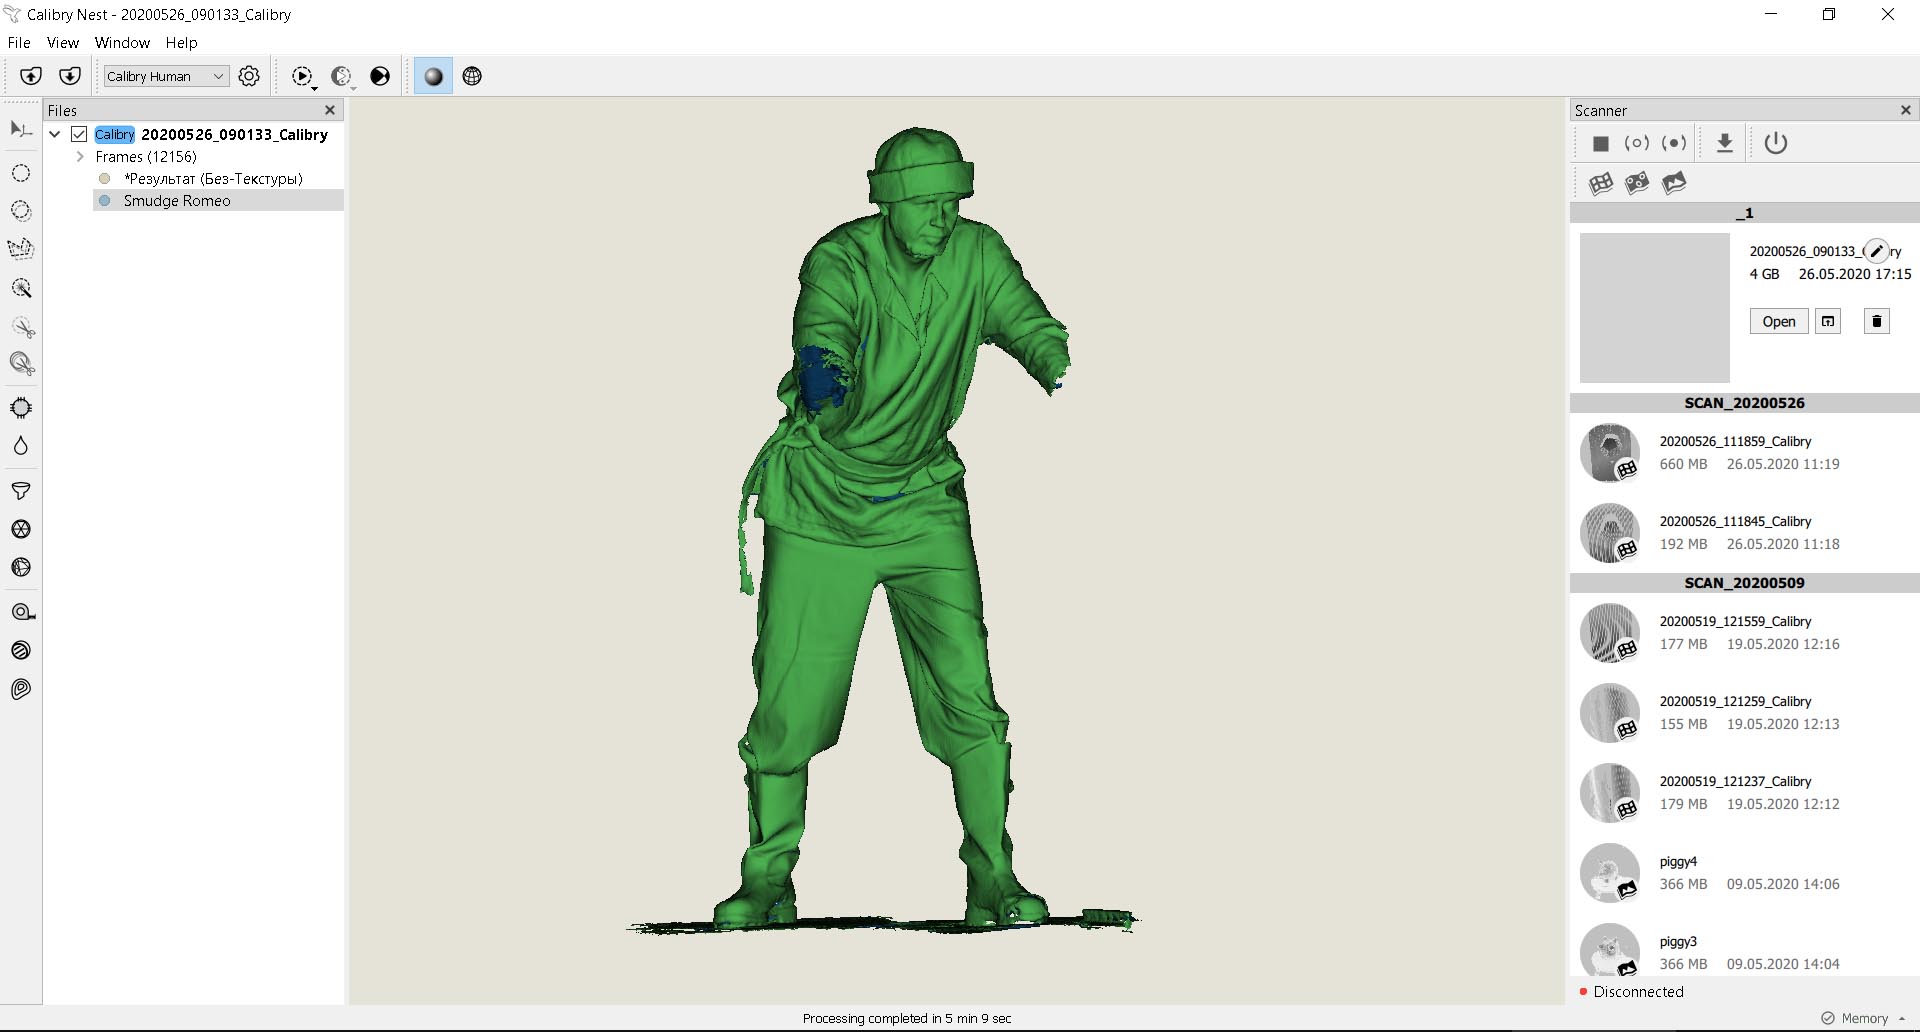
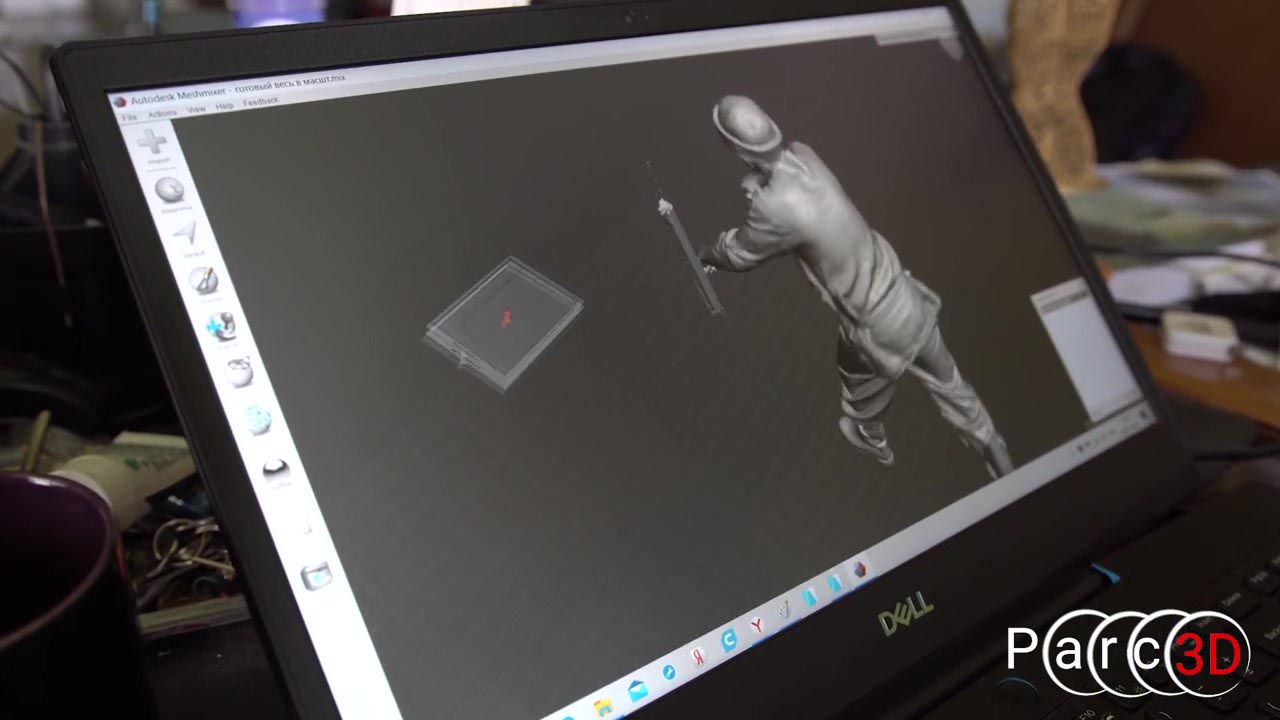
Along with the Calibry Nest software, a program called Autodesk Meshmixer was used to post-process the models and prepare them for 3D printing.
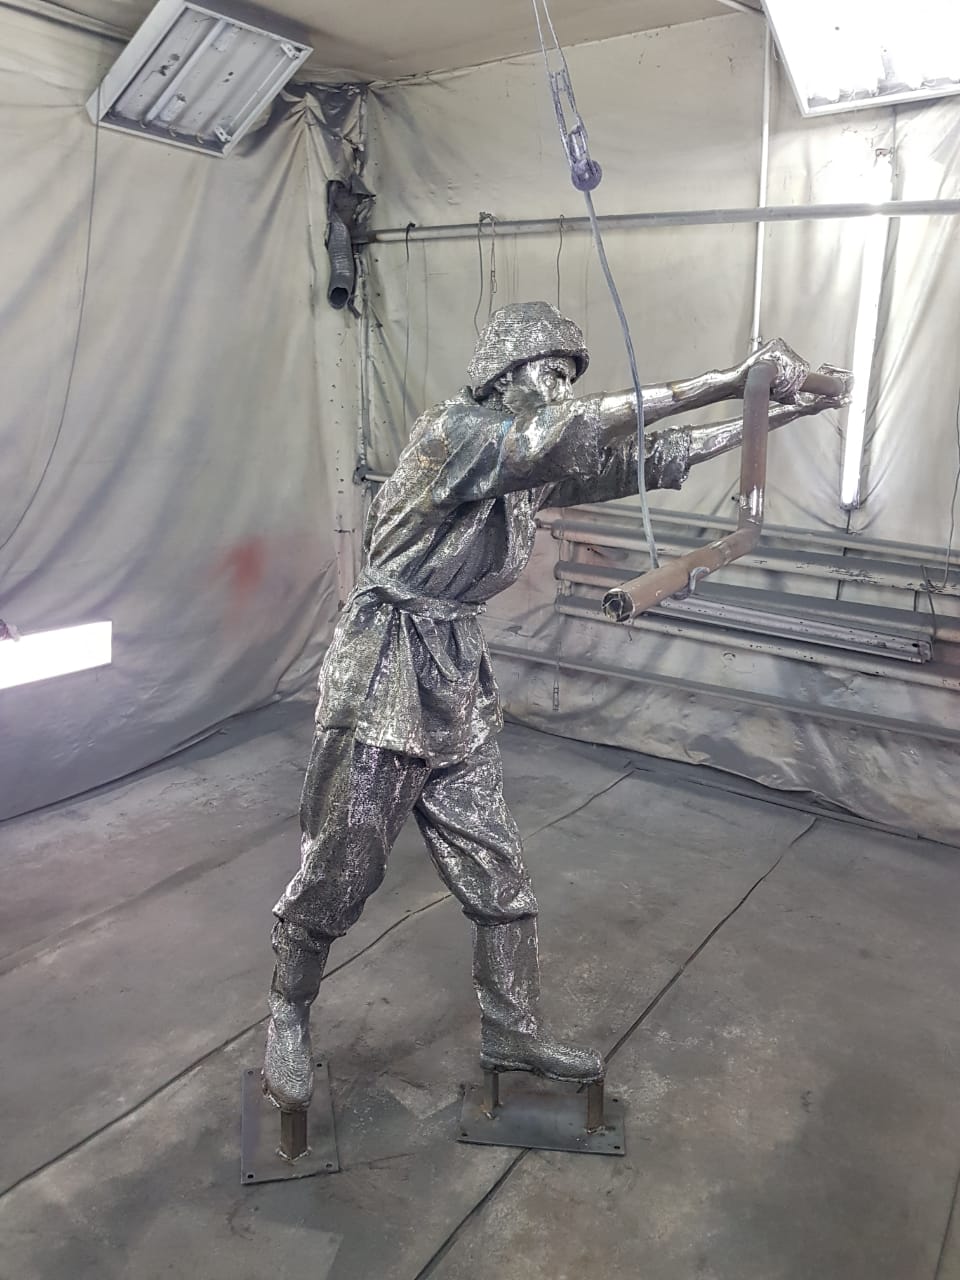
Printing the models was the final stage of the project. This took about 150 hours and more than 100 kilograms of the welding wire to manufacture two life-sized sculptures which each weighed 80 kg.
Despite the large printing surface area of the 3D printer, each statue had to be printed in sections which were then welded together.
Prior to installation, the sculptures were sanded and painted. The whole sculpture unifying tech and art turned out to be far more cost-effective than traditional molding and casting. The total time of production was approximately 10 days with 1 - 3 days spent on preparation and 7 days (12-hour days) of printing.
Conclusion:
The creation of a sculpture like "The Prospectors" via traditional casting could have taken anywhere from 2 to 6 months and would have cost upwards of 15,000 euros. With the use of 3D-scanning and printing, the cost was reduced to only 6,000 euros.
Now the architectural landscape of Vyksa, which consists mainly of wooden houses and industrial buildings has been enriched by a sculpture created entirely by 3D technology.