Sometimes during 3D scanning the scan result may accidentally split into several separate fragments. It usually looks like several distinct copies of the object shifted relative to each other:

This can happen for a number of reasons, the most common of which are:
-
Live3D mode is not activated — this mode creates a temporary 3D model of the object and allows to evaluate the quality of the scan "on the fly";
-
There was an abrupt movement of a scanner during scanning, which led to a momentary loss of tracking;
-
Low FPS (frames per second): a small number of frames captured per second is usually indicative of the use of a low-performance computer. It is also possible that some other resource-intensive tasks are running on the computer at the same time — in this case, the system may not have enough spare resources to process and save the data stream from the scanner;
-
There isn’t enough distinct geometry when scanning in geometry tracking mode (flat surfaces or surfaces with symmetrical and repeating elements, such as ventilation slots, fence bars, wheel spokes or propeller blades).
To avoid such layering of data, it is important to use a fast computer capable of quick processing of the stream of data coming from the scanner. It is also crucial to adequately select both the tracking mode (geometry/markers/texture) and the scanning trajectory, and activate Live3D mode, which simplifies scanning control.
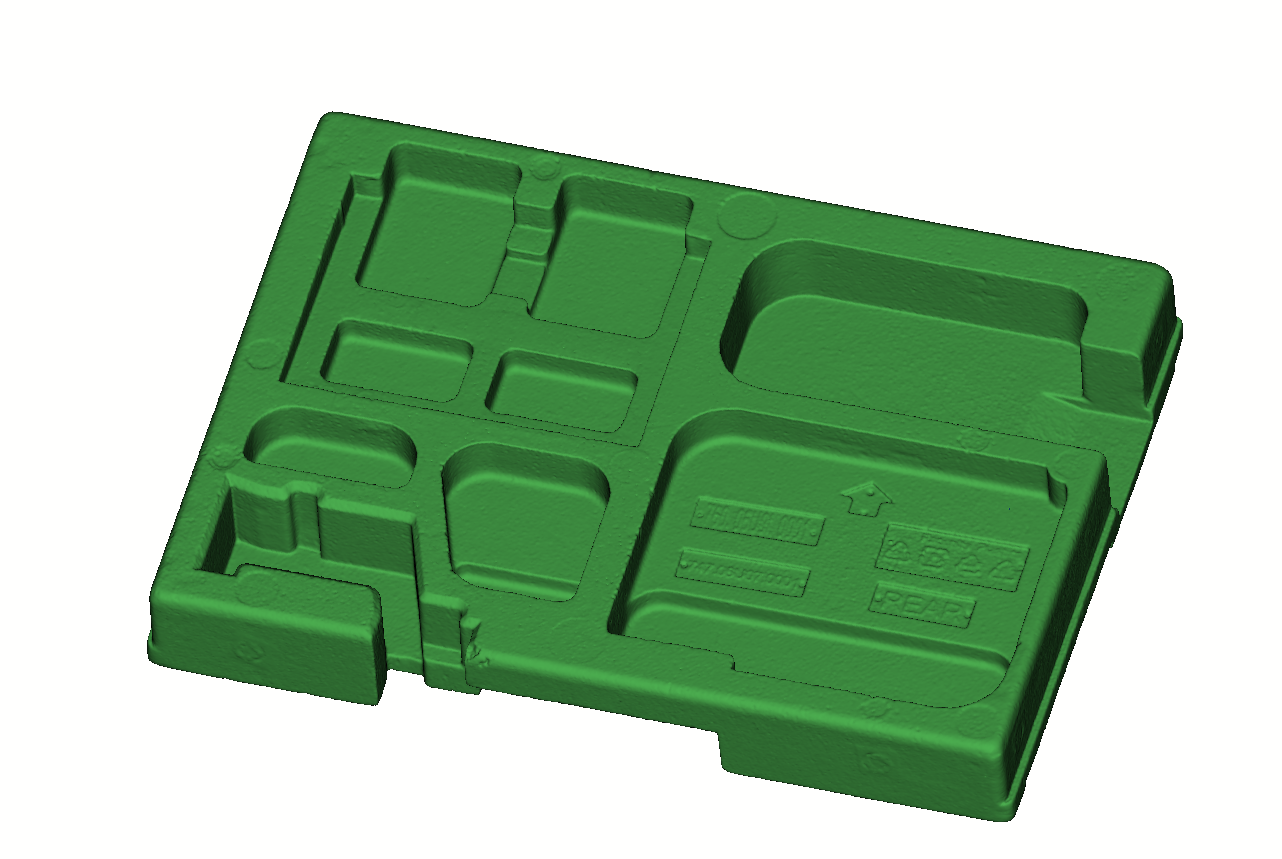
For the most part, there is no point to continue scanning if the object or some of its elements changed their respective positions — in this case, it is better to stop scanning, adjust the settings or reevaluate your scanning strategy, and start a new scan. However, if the shift is detected after scanning, and the scan as a whole contains good data or when re-scanning is not possible, it makes sense to try to cut off unnecessary data or split the scan into several chunks. In this article, we will look at this process in Calibry Nest 3.7.42.
First of all, for any scan it is necessary to run the registration, which is a key step of scan data processing: registration algorithms analyze the frames obtained during scanning and adjust their relative position in the most optimal way. This usually solves the problem of data layering and noise:
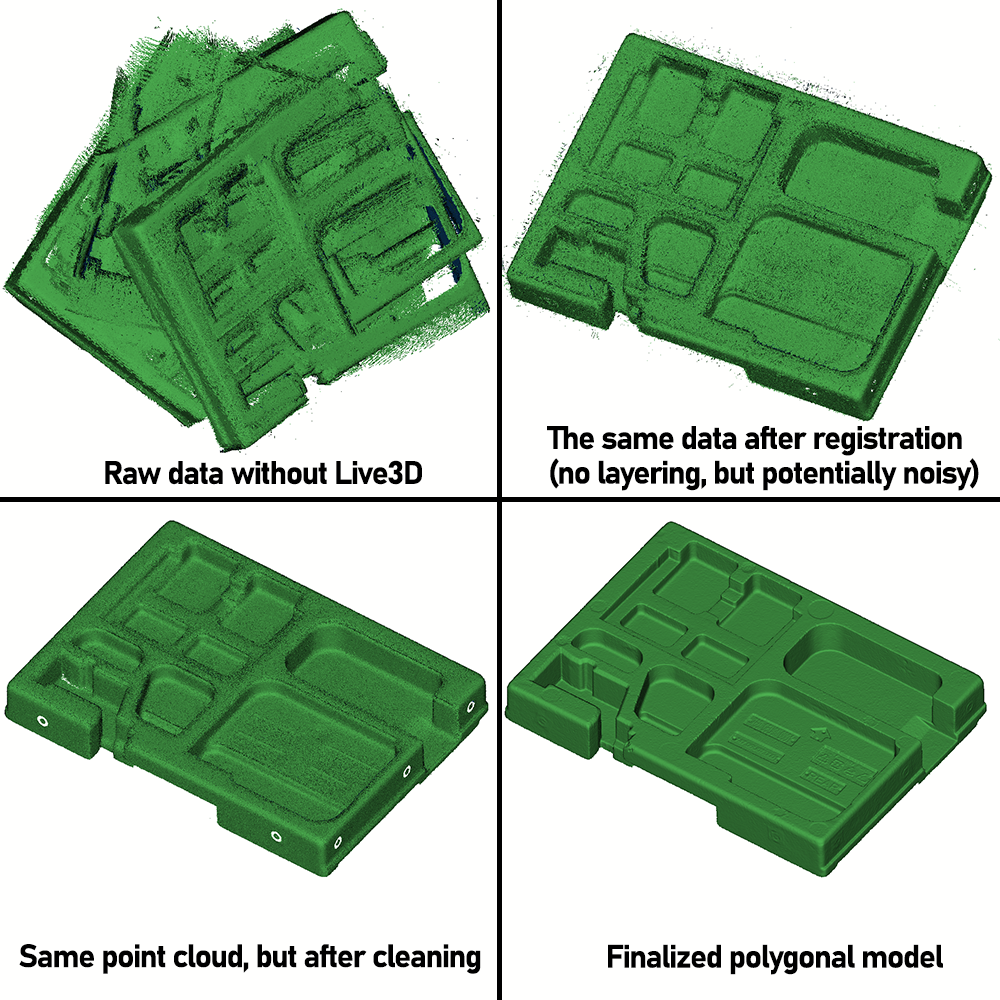
This scenario allows to eliminate most of the layering visible on raw data. However, if scanning mistakes are too substantial, it is possible that the registration algorithm will not be able to rectify the issue.
In this case, some parts of the scan data can be deleted, however, this refers not to deleting data from the entire point cloud directly, but rather to sequentially selecting scan frames up to the point of inconsistency. Let's take a look at the specific example.
To find the point of layering in the scan, expand the list of its frames in the project panel:
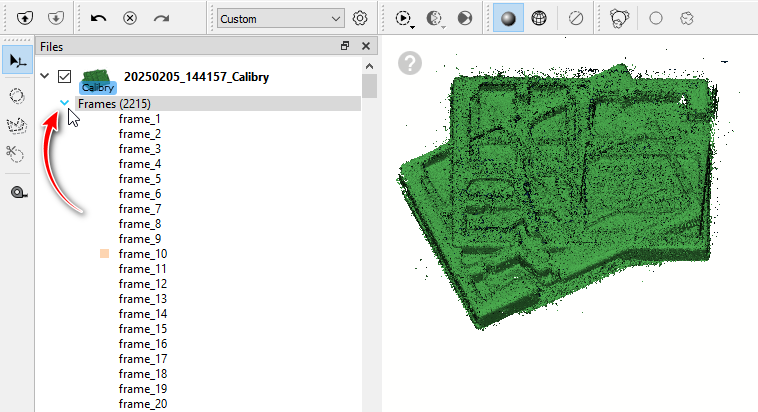
Each data frame contains a small part of the overall point cloud. The task is to find the first frame that falls out of the overall sequence. Start selecting frames and watch the point cloud in the editing area grow: as more and more frames are being selected, the cloud gets denser:
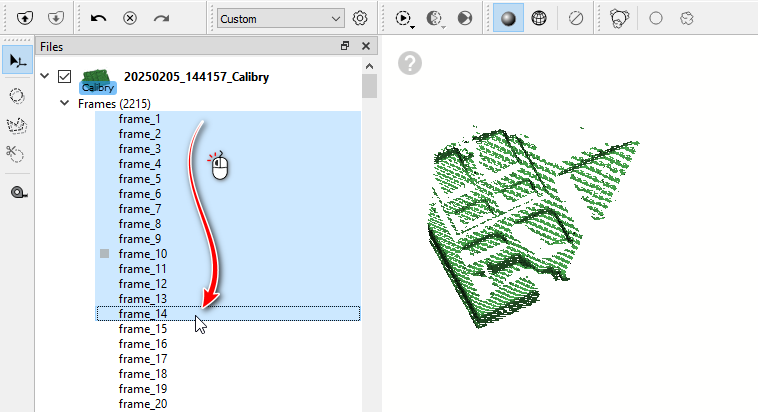
At the moment when the outline of another copy of the object begins to appear on the point cloud (1), go back a little in the list of frames, up to the frame at which the layering is still not noticeable (2):
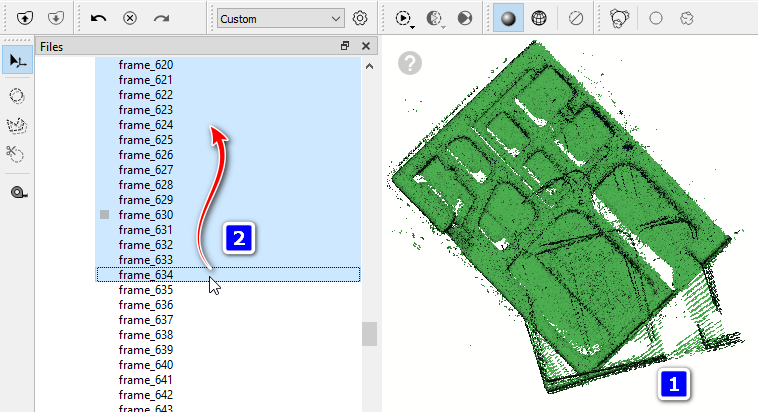
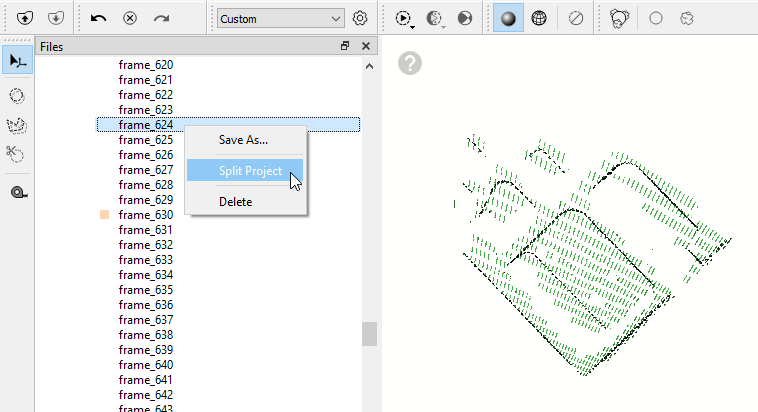
At this place the scan can be split into two chunks. Select the frame to split at and pick "Split Project" from the context menu:
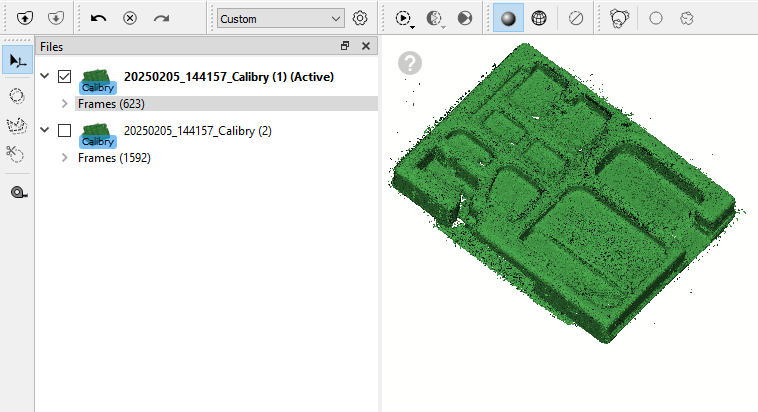
After that two separate chunks of the scan will appear in the list of scans, both of which can be processed and saved independently as separate scans:
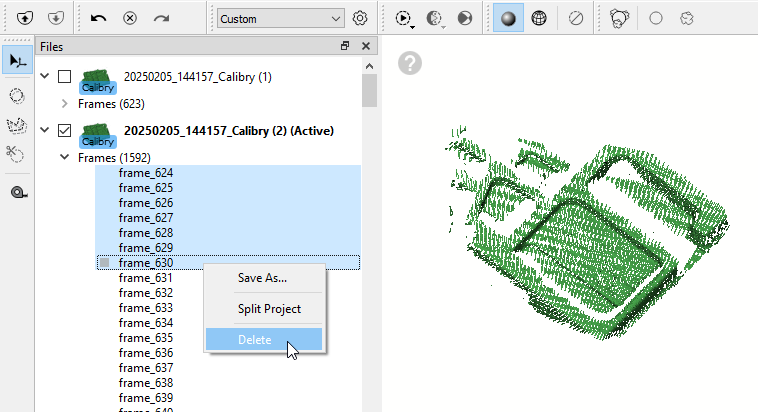
Sometimes, after splitting a scan, one of the chunks may contain several outlier frames that can simply be deleted:
In the same way, it is possible to remove some frames at the end of a scan if the tracking failure occurred at the end of scanning and the scanning was stopped.
During further processing, these chunks of the split scans can be used as fragments for assembling the final model together with other scans of the same object.